Transfer data with WinSCP
In order to use WinSCP make sure that your using at least version 5.16. You can check the version in Help -> About.
Note
A version of WinSCP that does not need administrator access to be installed can be downloaded from WinSCP Portable.
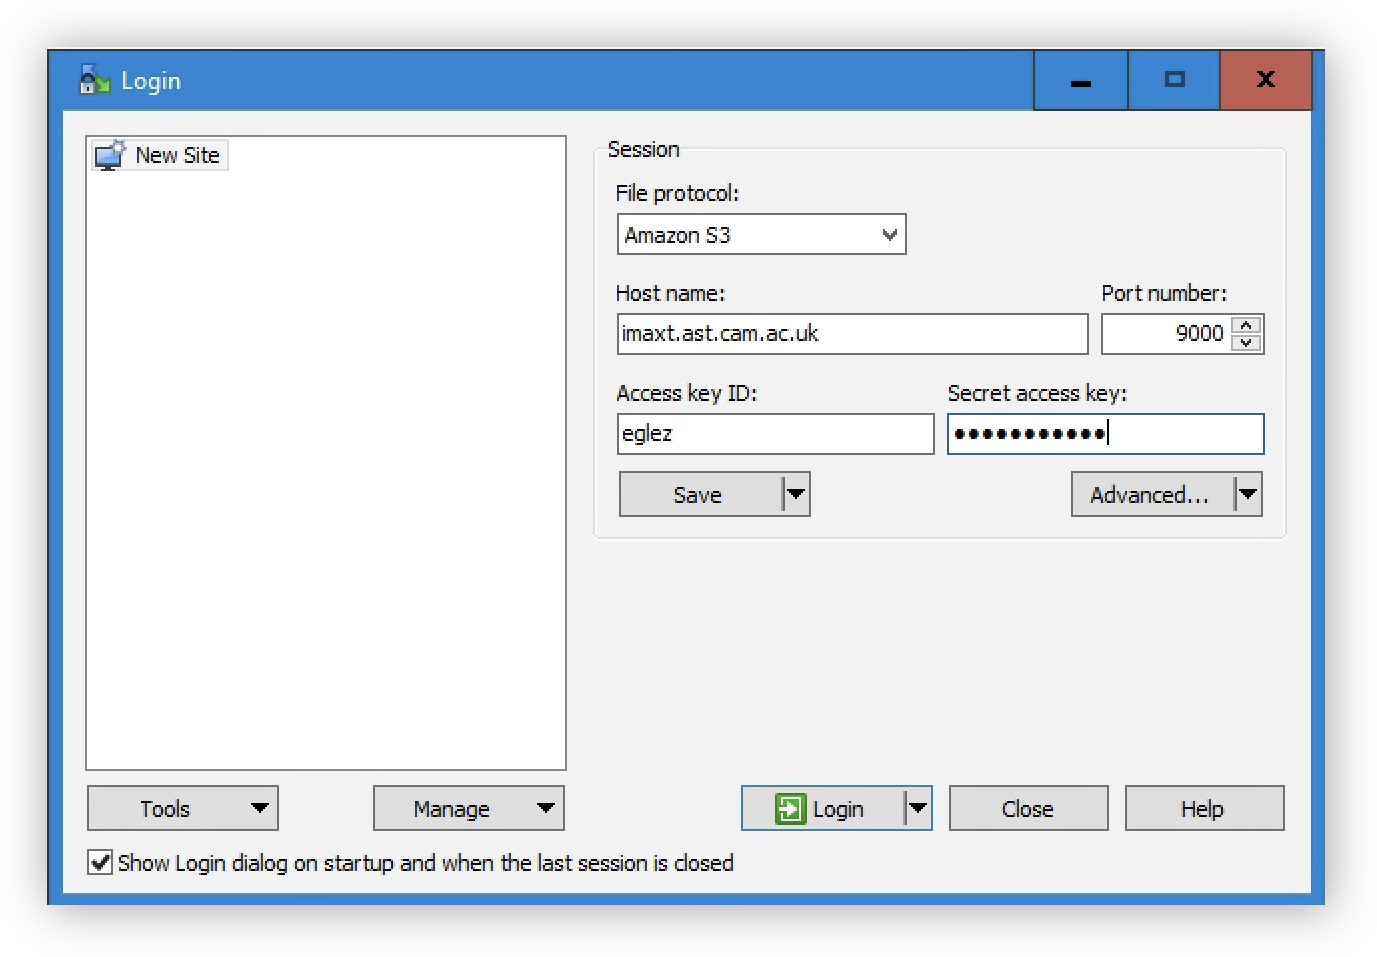
In order to setup the connection in the Login window as explained below:
File protocol: Amazon S3
Host name: imaxt.ast.cam.ac.uk
Port number: 9000
Access Key ID: You archive username
Secret access key: Your archive password
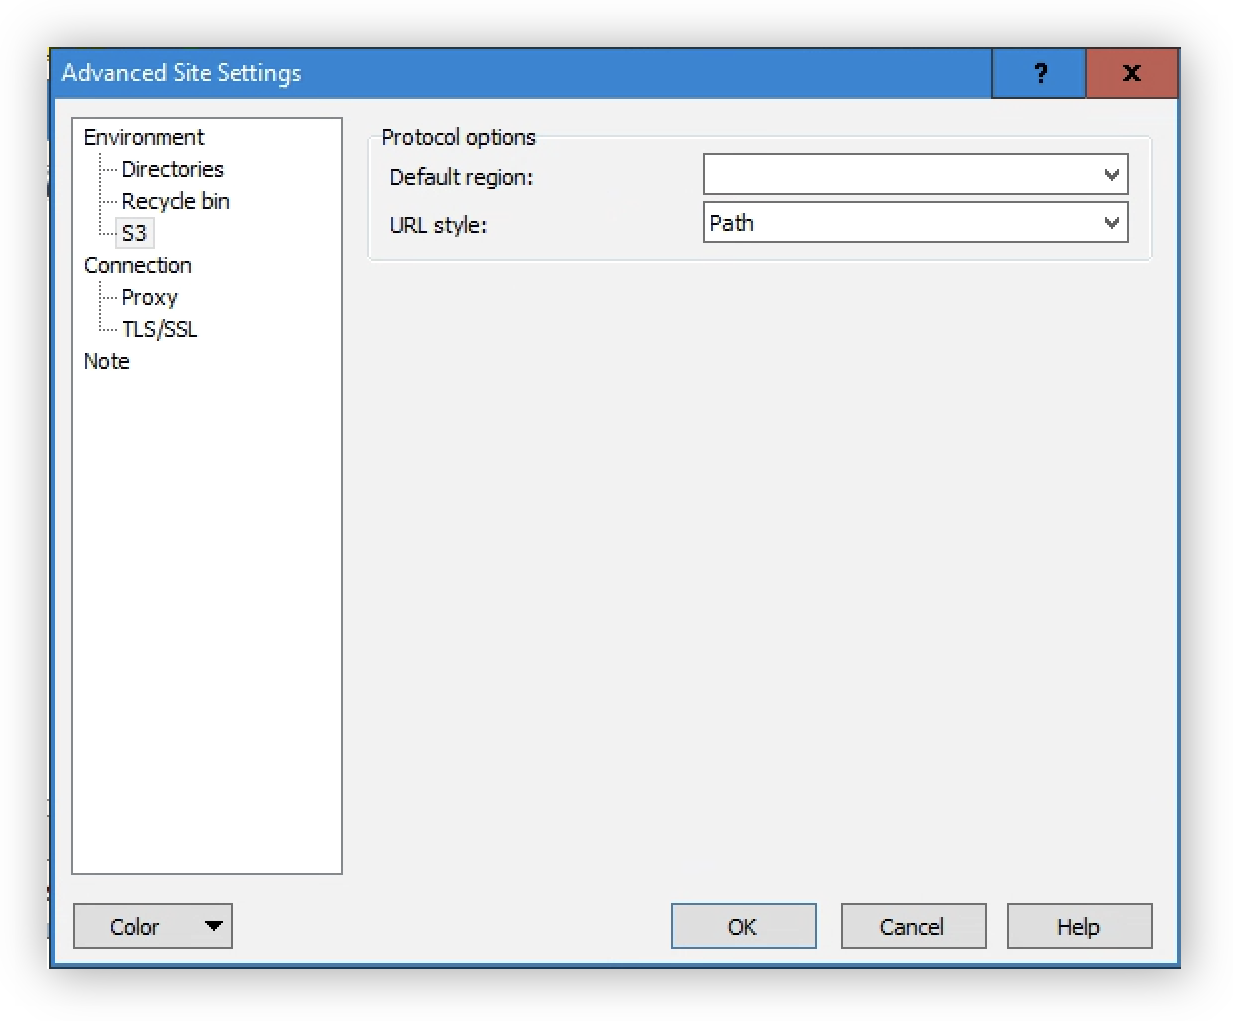
Then click on Advanced, navigate to the S3 section and make sure that URL Style is set to Path and click OK.
Once back in the main login screen, click the Login button. Use your archive username and password as credentials.
If login is succesful you will get a screen like shown below with two panels that represent your local filesystem (left) and the remote one (right). You can transfer files or directories from one to another just dragging from one panel to the other.
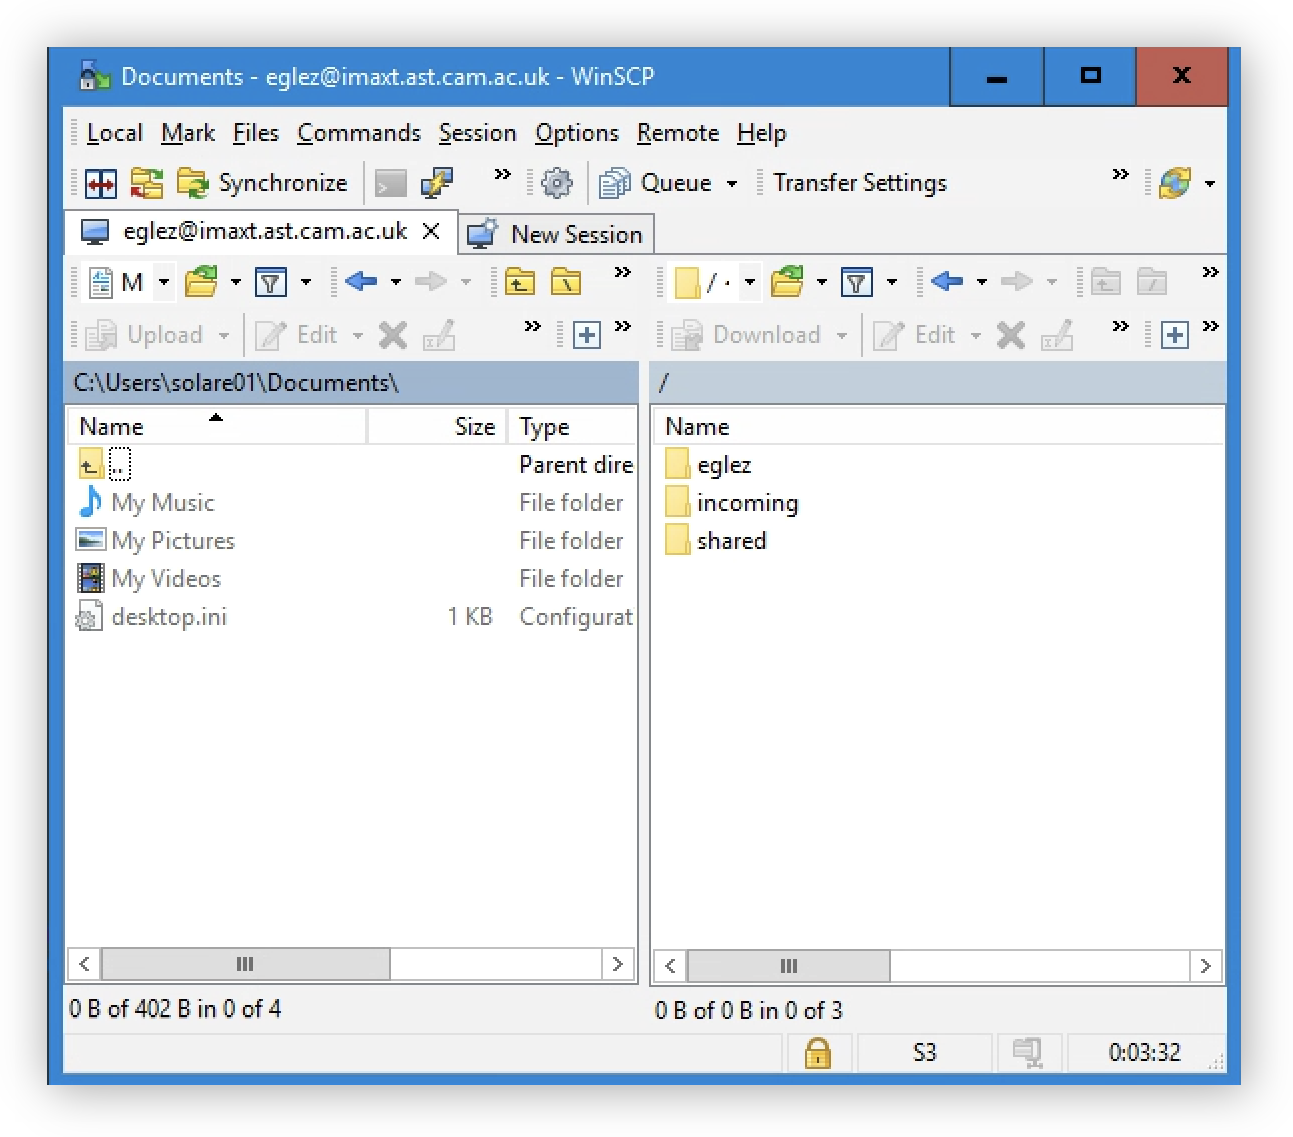
The top directories that you see in the remote system are called buckets. The list of buckets in remote system can be different for different users depending on permissions but all users will have at least two buckets setup:
username: this bucket is named as your username in the archive and is private to each user.
imaxt or shared: this bucket contains data that can be shared between users. Currently all users have read write permissions. This is shown as
Sharedand/storage/imaxtin JupyterLab.
