JupyterLab
Interactive access is provided using JupyterLab. See the JupyterLab User Guide for general documentation an tutorials on how to use the web interface.
In order to login IMAXT JupyterLab you will need an account in the Operational Repository. Just click the Register button in the login page and follow the authentication steps. Once your account has been created login and follow the links to Interactive Access.
Warning
We only support an interactive usage of the Jupyter environment. Don’t expect your notebook code to continue running after you have logged out.
Each user’s JupyterLab instance inside JupyterHub is running in a separate Docker container. On successful login you will presented with a choice of virtual environments from which to select one. They differ mainly in the resources that are requested (number of CPU, memory or access to the GPU). In all of them a default Python environment is provisioned, including the most popular Python packages used for data science. The working directory for each user’s instance is separated.
By default, we have enabled JupyterLab as a user interface. If you prefer the classic Jupyter notebook environment, click Help -> Launch Classic Notebook.
Below is a screenshot of the page that opens when you first launch JupyterLab.
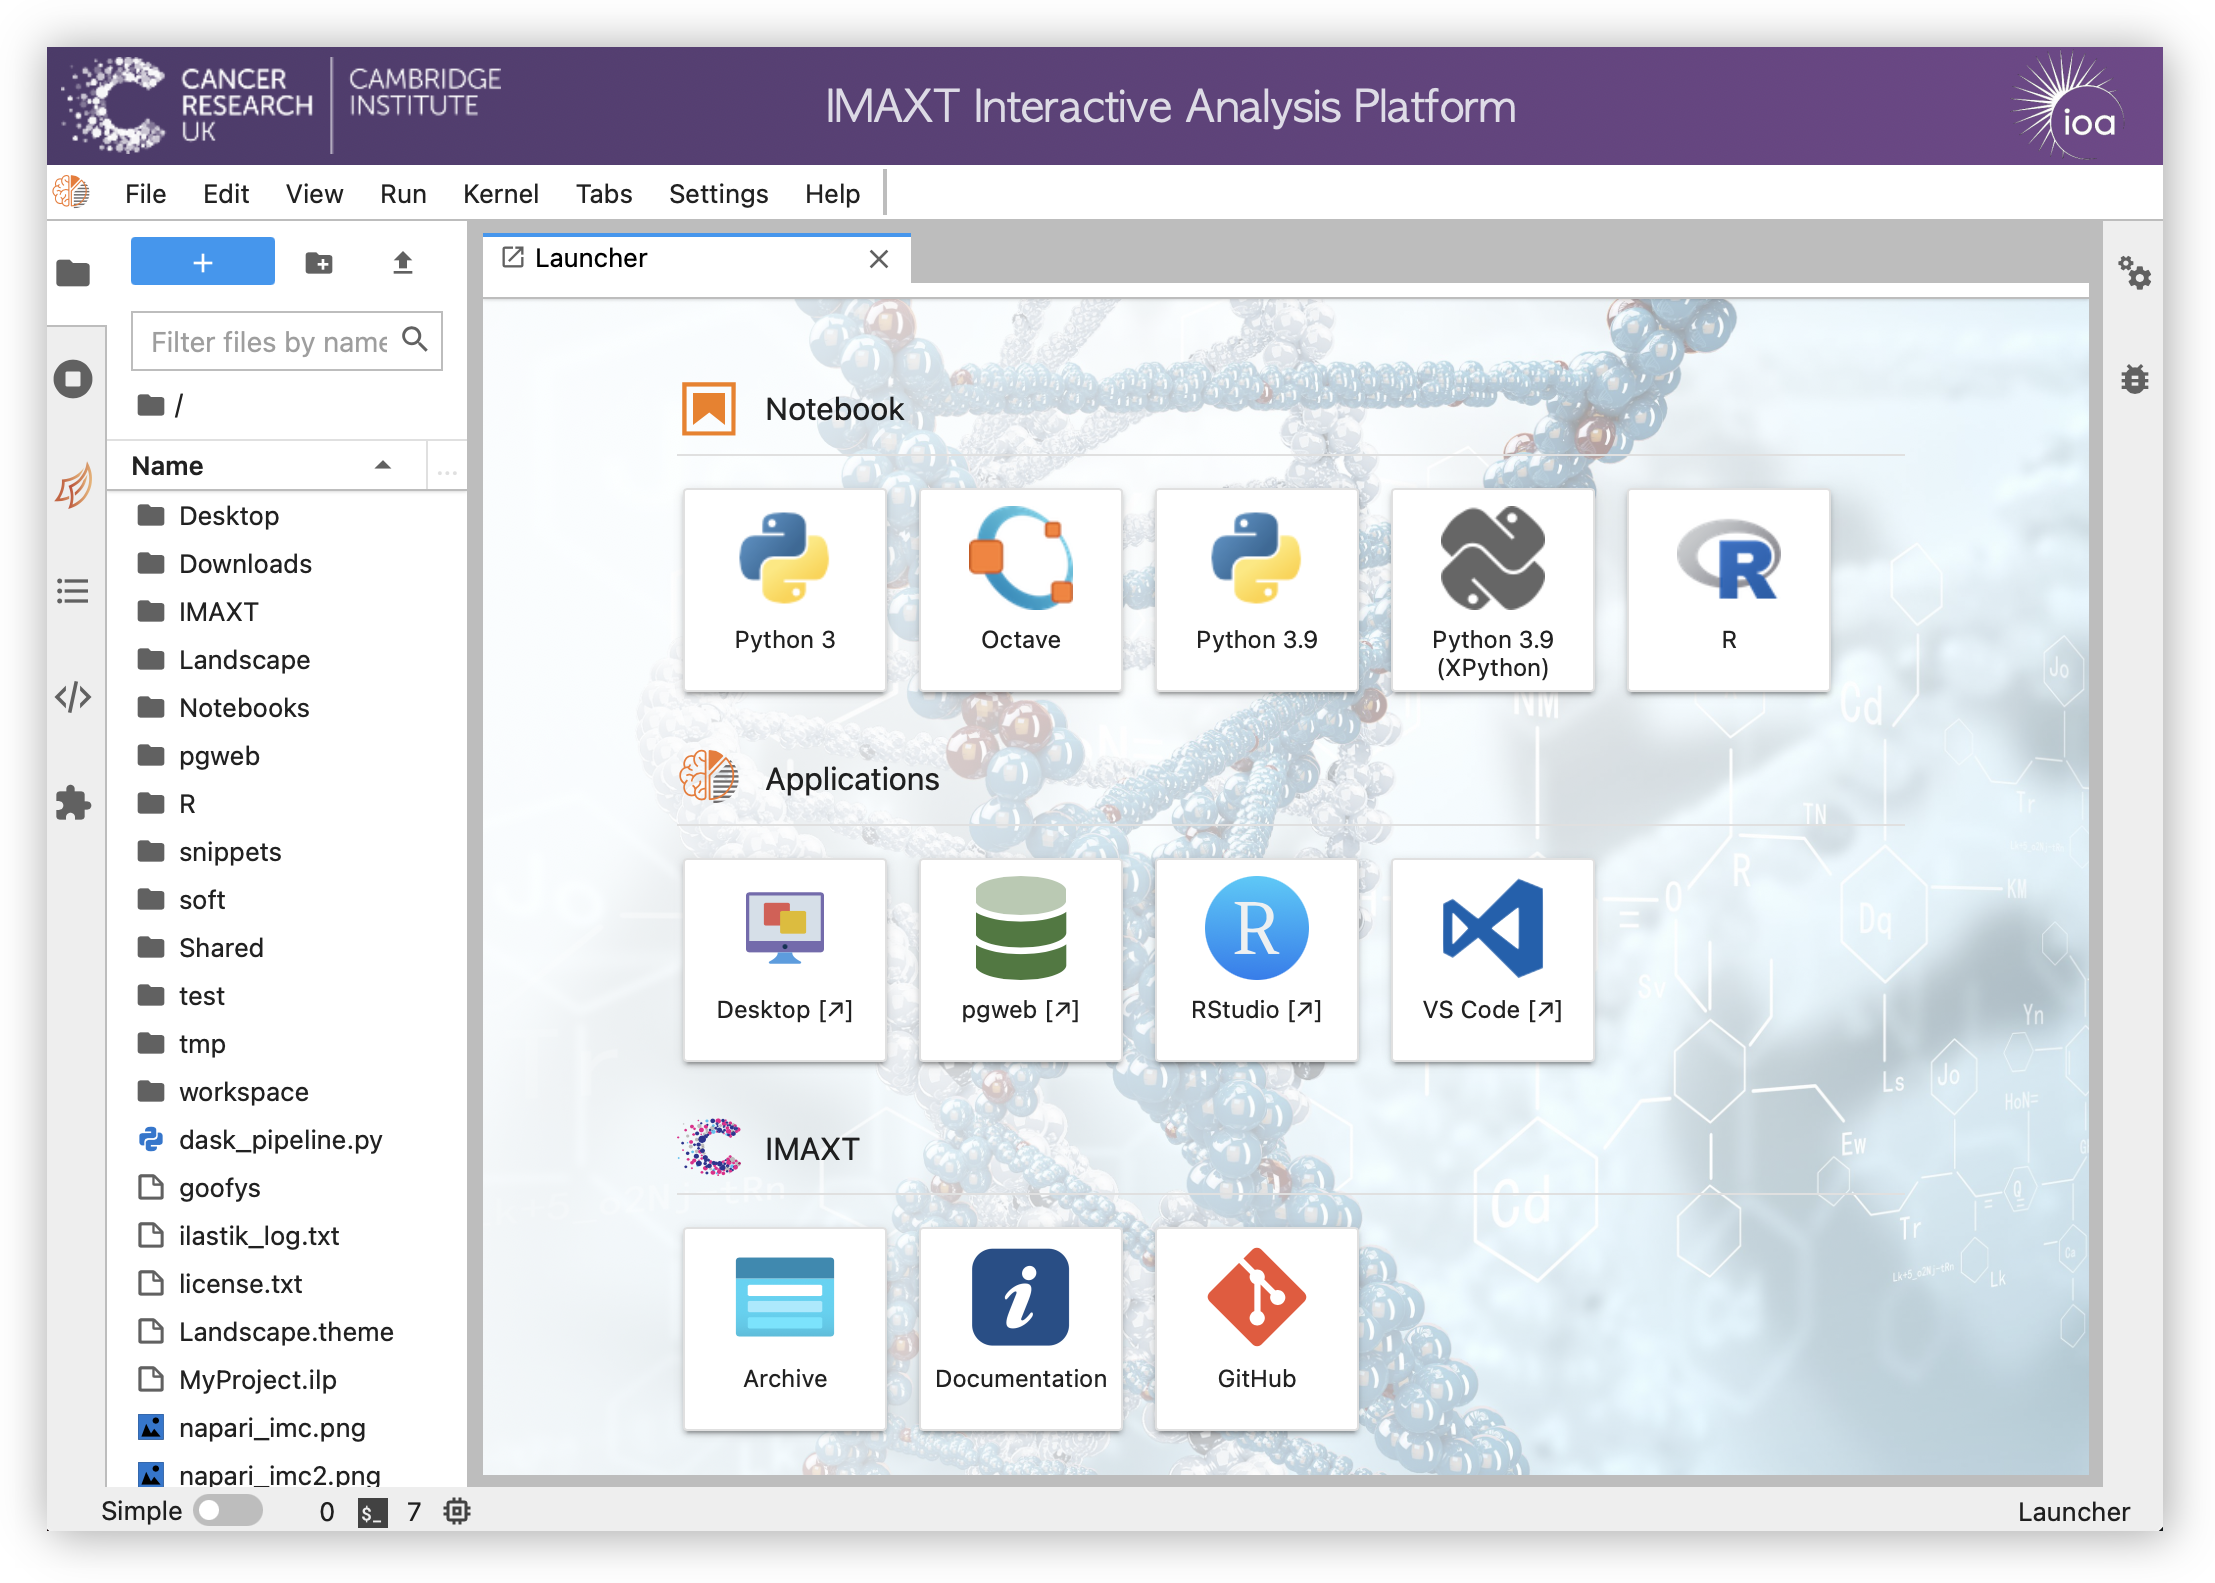
The JupyterLab interface
The JupyterLab interface consists of a main work area containing tabs of documents and activities, a collapsible left sidebar, and a menu bar. The left sidebar contains a file browser, the list of running kernels and terminals, the command palette, the notebook cell tools inspector, and the tabs list.
Menu Bar

The menu bar at the top of JupyterLab has top-level menus that expose actions available in JupyterLab with their keyboard shortcuts. The default menus are:
File: actions related to files and directories
Edit: actions related to editing documents and other activities
View: actions that alter the appearance of JupyterLab
Run: actions for running code in different activities such as notebooks and code consoles
Kernel: actions for managing kernels, which are separate processes for running code
Snippets: collection of code snippets that can be included in notebooks
Tabs: a list of the open documents and activities in the dock panel
Settings: common settings and an advanced settings editor
Help: a list of JupyterLab and kernel help links
IMAXT: project specific links
The right of the menubar contains the actual version of the stack running.
Main Work Area
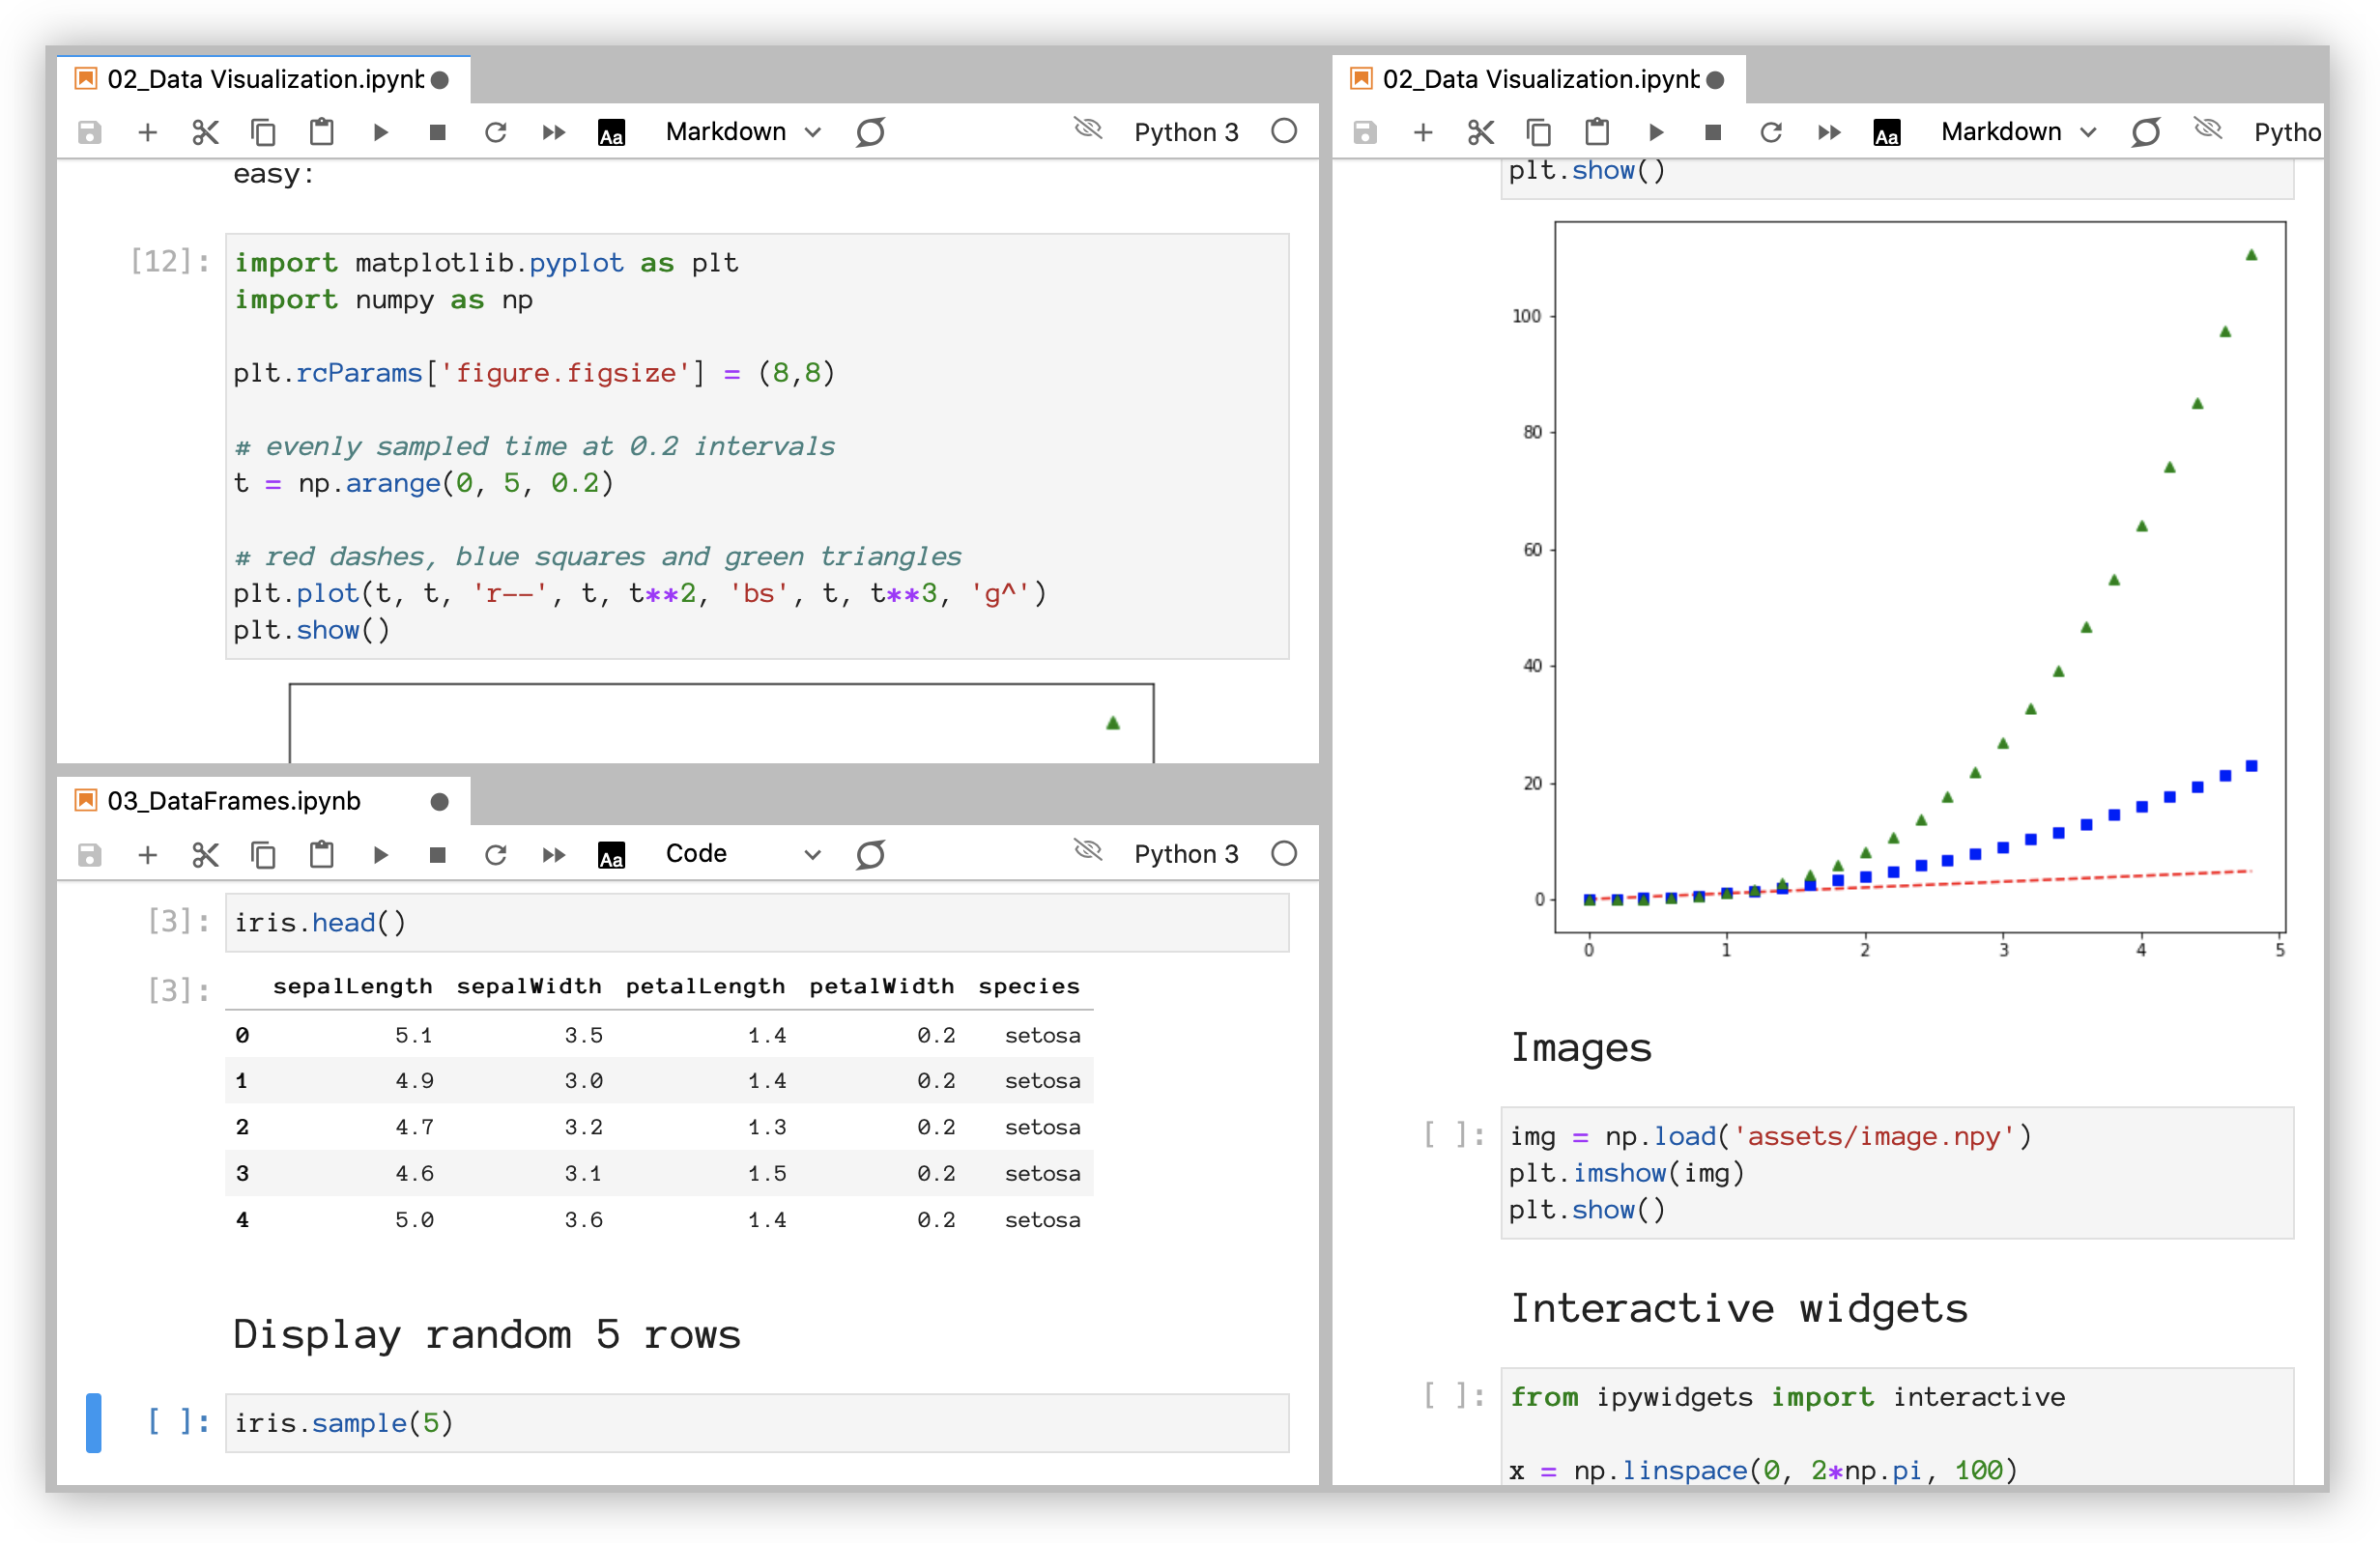
The main work area in JupyterLab enables you to arrange documents (notebooks, text files, etc.) and other activities (terminals, code consoles, etc.) into panels of tabs that can be resized or subdivided.
Creating a Jupyter Notebook
Jupyter notebooks are documents that combine live runnable code with narrative text (Markdown), equations (LaTeX), images, interactive visualizations and other rich output.
Notebook files have the extension .ipynb to distinguish them from text files or other Python scripts but can be exported as HTML, PDF or Python.
You can create a new notebook in several ways. From the main workspace launch bar click on one of the icons representinf the language you want to write your code in. E.g. in order to write a notebook in Python click on Python 3. Each of the programming languages available is called a kernel (click on the link for more information about kernels).
Alternatively you can select File -> New -> Notebook from the menu bar or click on the + button in the file browser and then selecting a kernel.
When you create a notebook it will be assigned a name like Untitled.ipynb. Right click on the name and change it to something more meaniful. See FAQ: Naming Notebooks for tips.
More information about notebooks can be found in the Notebooks official documentation.
Each notebook contains a combination of text, code and figures that tell a story about some analysis. Each piece of code can be distributed in cells and each cell can be run independetly.
Keyboard shortcuts
While all operations can be done using the menu or the mouse right button there are a few keyboard shortcuts that are useful to know in order to speed things up.
If you press Esc and Return alternately, the outer border of your code cell will change from gray to blue. These are the Command (gray) and Edit (blue) modes of your notebook. Command mode allows you to edit notebook-level features, and Edit mode changes the content of cells. When in Command mode (esc/gray),
The b key will make a new cell below the currently selected cell.
The a key will make one above.
The x key will delete the current cell.
The z key will undo your last cell operation (which could be a deletion, creation, etc).
Types of cells
Markdown
Markdown cells contain text. They are called Markdown because that is the name of the language used to write the text. It is a very simple plain-text format that allows to write different headers, list, tables, links, etc.
In command mode (Esc) a cell can be set as markdown with the m key.
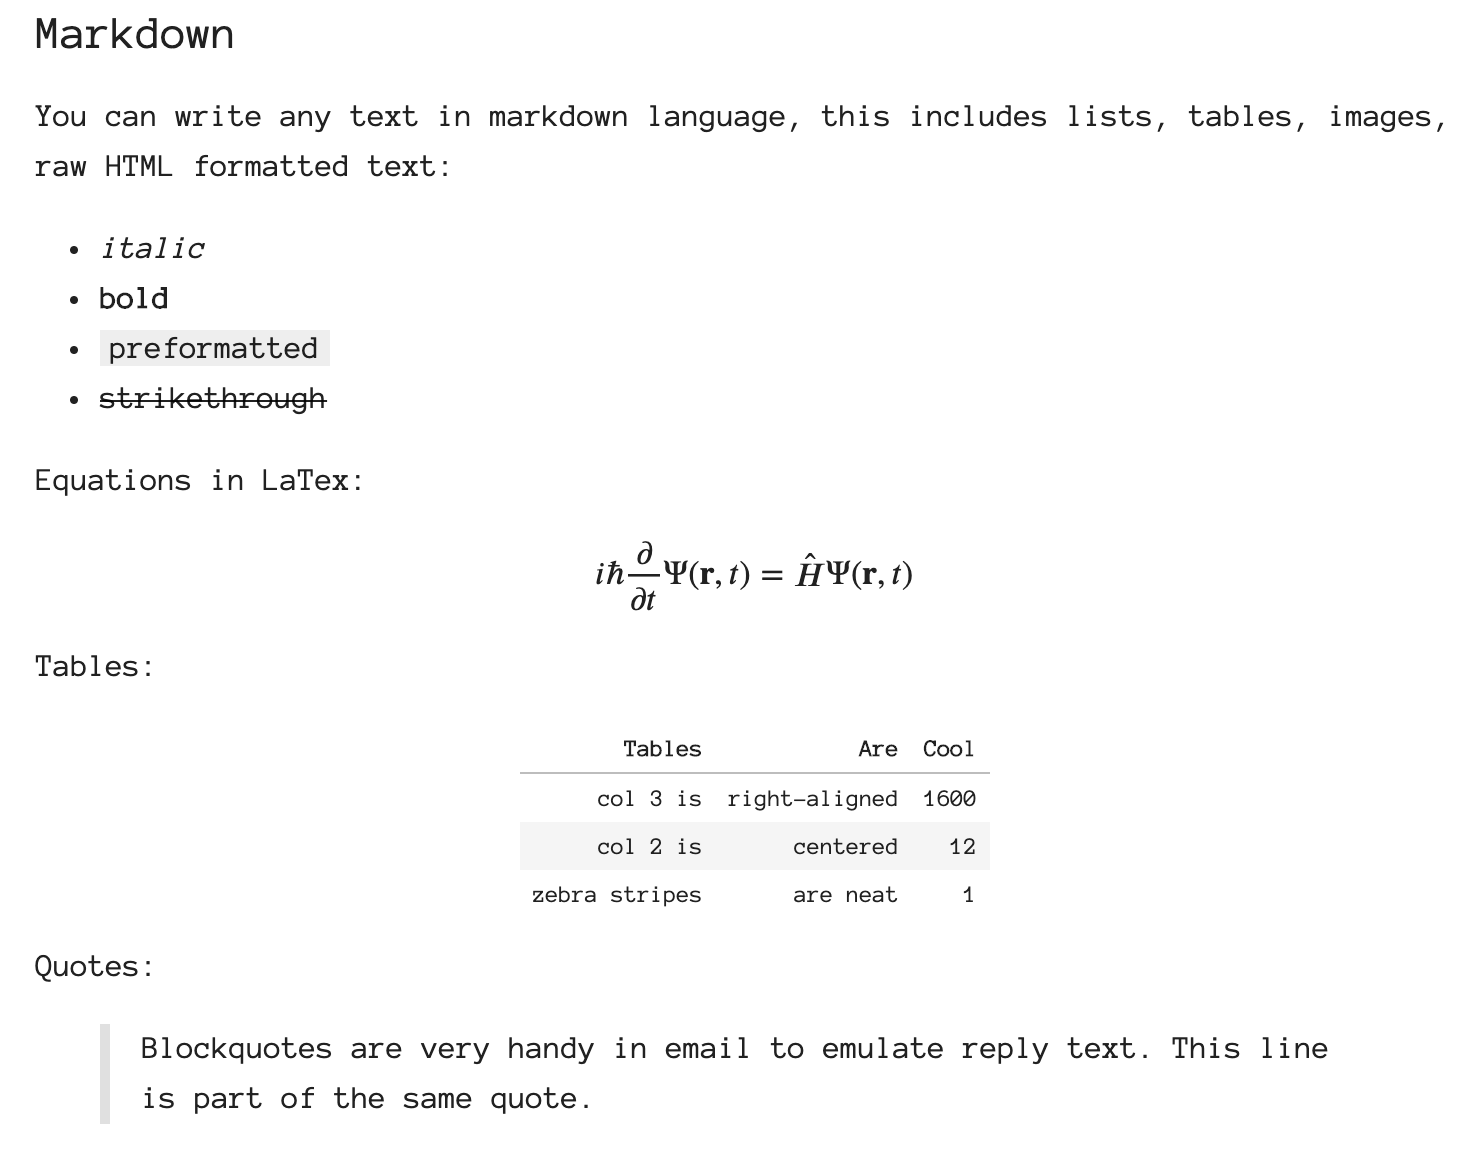
The following is an example of markdown text
### Markdown

You can write any text in markdown language, this includes lists, tables, images, raw HTML formatted text:

* *italic*
* **bold**
* `preformatted`
* ~~strikethrough~~

Equations in LaTex:

\begin{equation}
 \hbar \frac{\partial}{\partial t}\Psi(\mathbf{r},t) = \hat H \Psi(\mathbf{r},t)
\end{equation}

Tables:

| Tables        | Are           | Cool  |
| ------------- |:-------------:| -----:|
| col 3 is      | right-aligned |  1600 |
| col 2 is      | centered      |    12 |
| zebra stripes | are neat      |     1 |

Quotes:

> Blockquotes are very handy in email to emulate reply text.
> This line is part of the same quote.
and this is how it would look like in the notebook
Markdown cells accept also HTML formatted text.
Code
Code cells are cells that contain code that is interpreted and run interactively. You can write code in the cell as in a normal editor and run it either selecting Run from the menu or using Shift + Return. In this case the current active cell will be executed and the next cell will become the active one (the next to run). Other useful shortcuts are:
Ctrl + Return will execute the cell but will not advance to the next cell
Alt + Return will execute the cell and create a new empty cell after it
In command mode (Esc) a cell is set as code cell with y.
Raw
The final cell type is raw and it is used to write raw text, whatever is written there will not be translated and it will appear exactly as written.
In command mode (Esc) a cell is set as code cell with r.
Closing JupyterLab
In order to exit the system, make sure that your notebooks are saved. Then File -> Log Out.
