Parallel processing using Dask
In order to enable parallel (and distributed) workflows we use a library called Dask. We will describe here a few basics, the Dask site hosts the complete documentation.
We do have some tutorials that show how to use Dask in our environment.
Dask can be run in two modes. One is as a local cluster in the same virtual machine where your notebooks are running. This is in a way similar to using the Python multiprocessing, multithreading or asyncio libraries although Dask provides a level of abstraction that makes it usage much easier.
Dask can be run also in distributed mode, where workers run in several virtual environments across the cluster. In this mode you can run workflows that use more CPU and memory than the allocated to your notebook environment.
The difference between the two modes is in how the clusters are initialized, everything else in the code remains identical.
Single machine cluster
You can trivially set up a local cluster on your machine by instantiating a Dask Client with no arguments
from distributed import Client
client = Client()
This sets up a scheduler in your local process and several processes running single-threaded Workers.
If you want to run workers in your same process, you can pass the processes=False keyword argument.
client = Client(processes=False)
This is sometimes preferable if you want to avoid inter-worker communication and your computations release the GIL. This is common when primarily using NumPy or Dask Array.
Distributed LocalCluster
A LocalCluster cluster can be also started and managed from the JupyterLab interface.
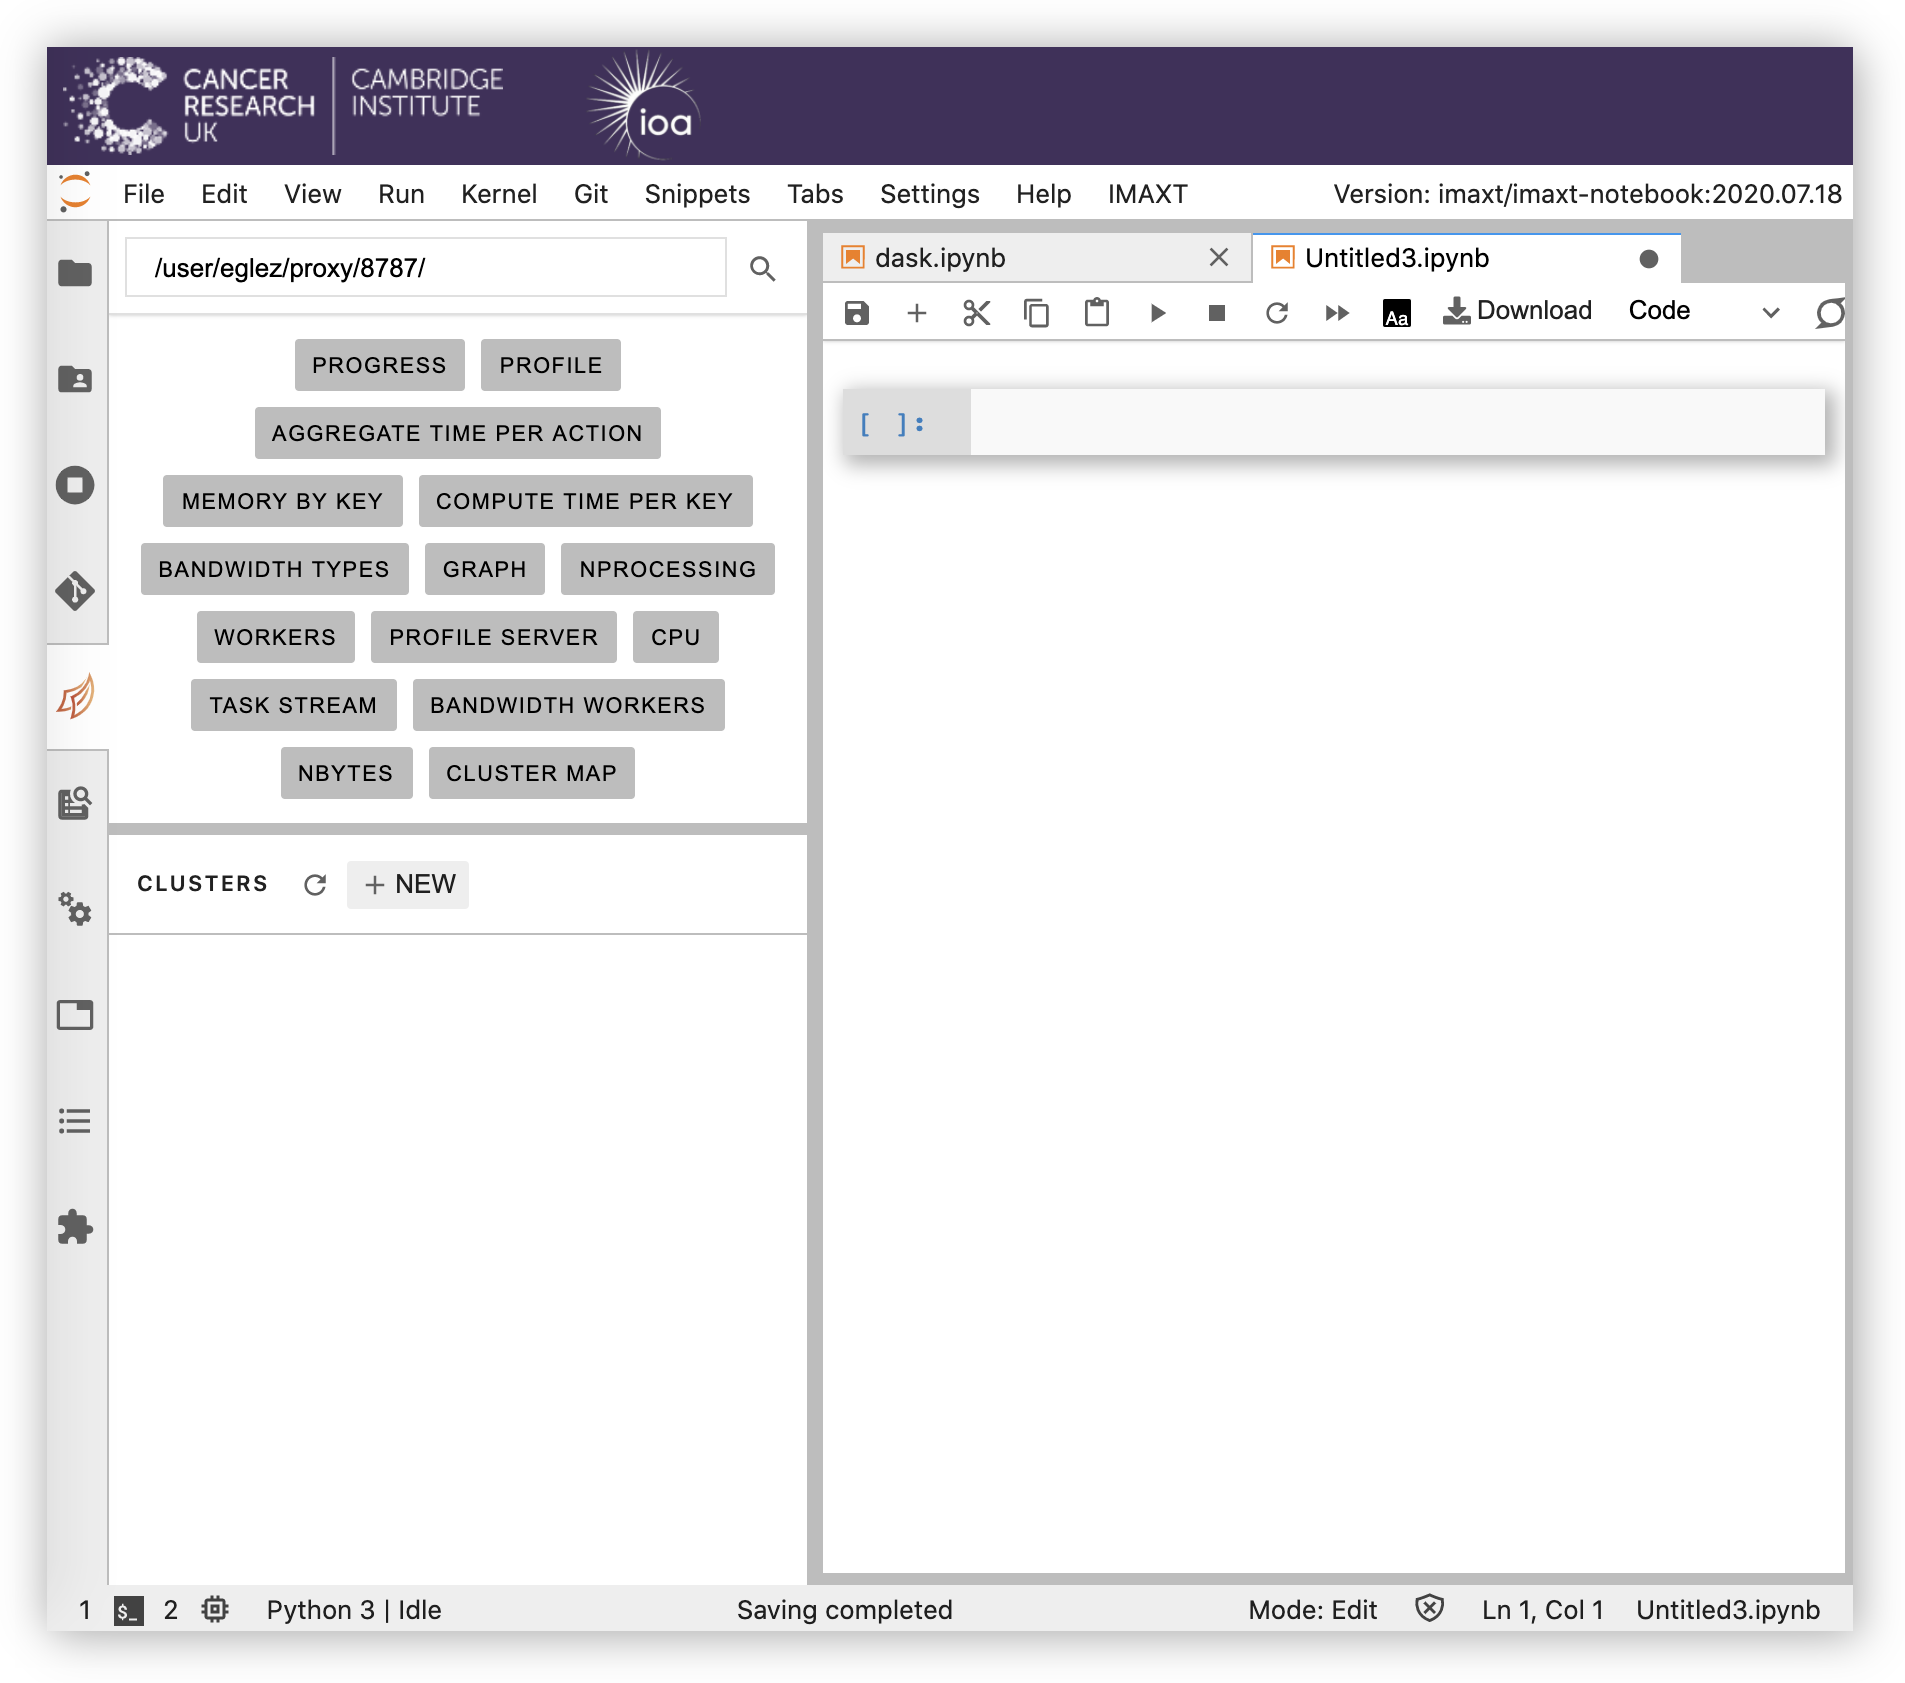
In order to initialize the cluster, select the Dask logo in the left bar and click on + NEW.
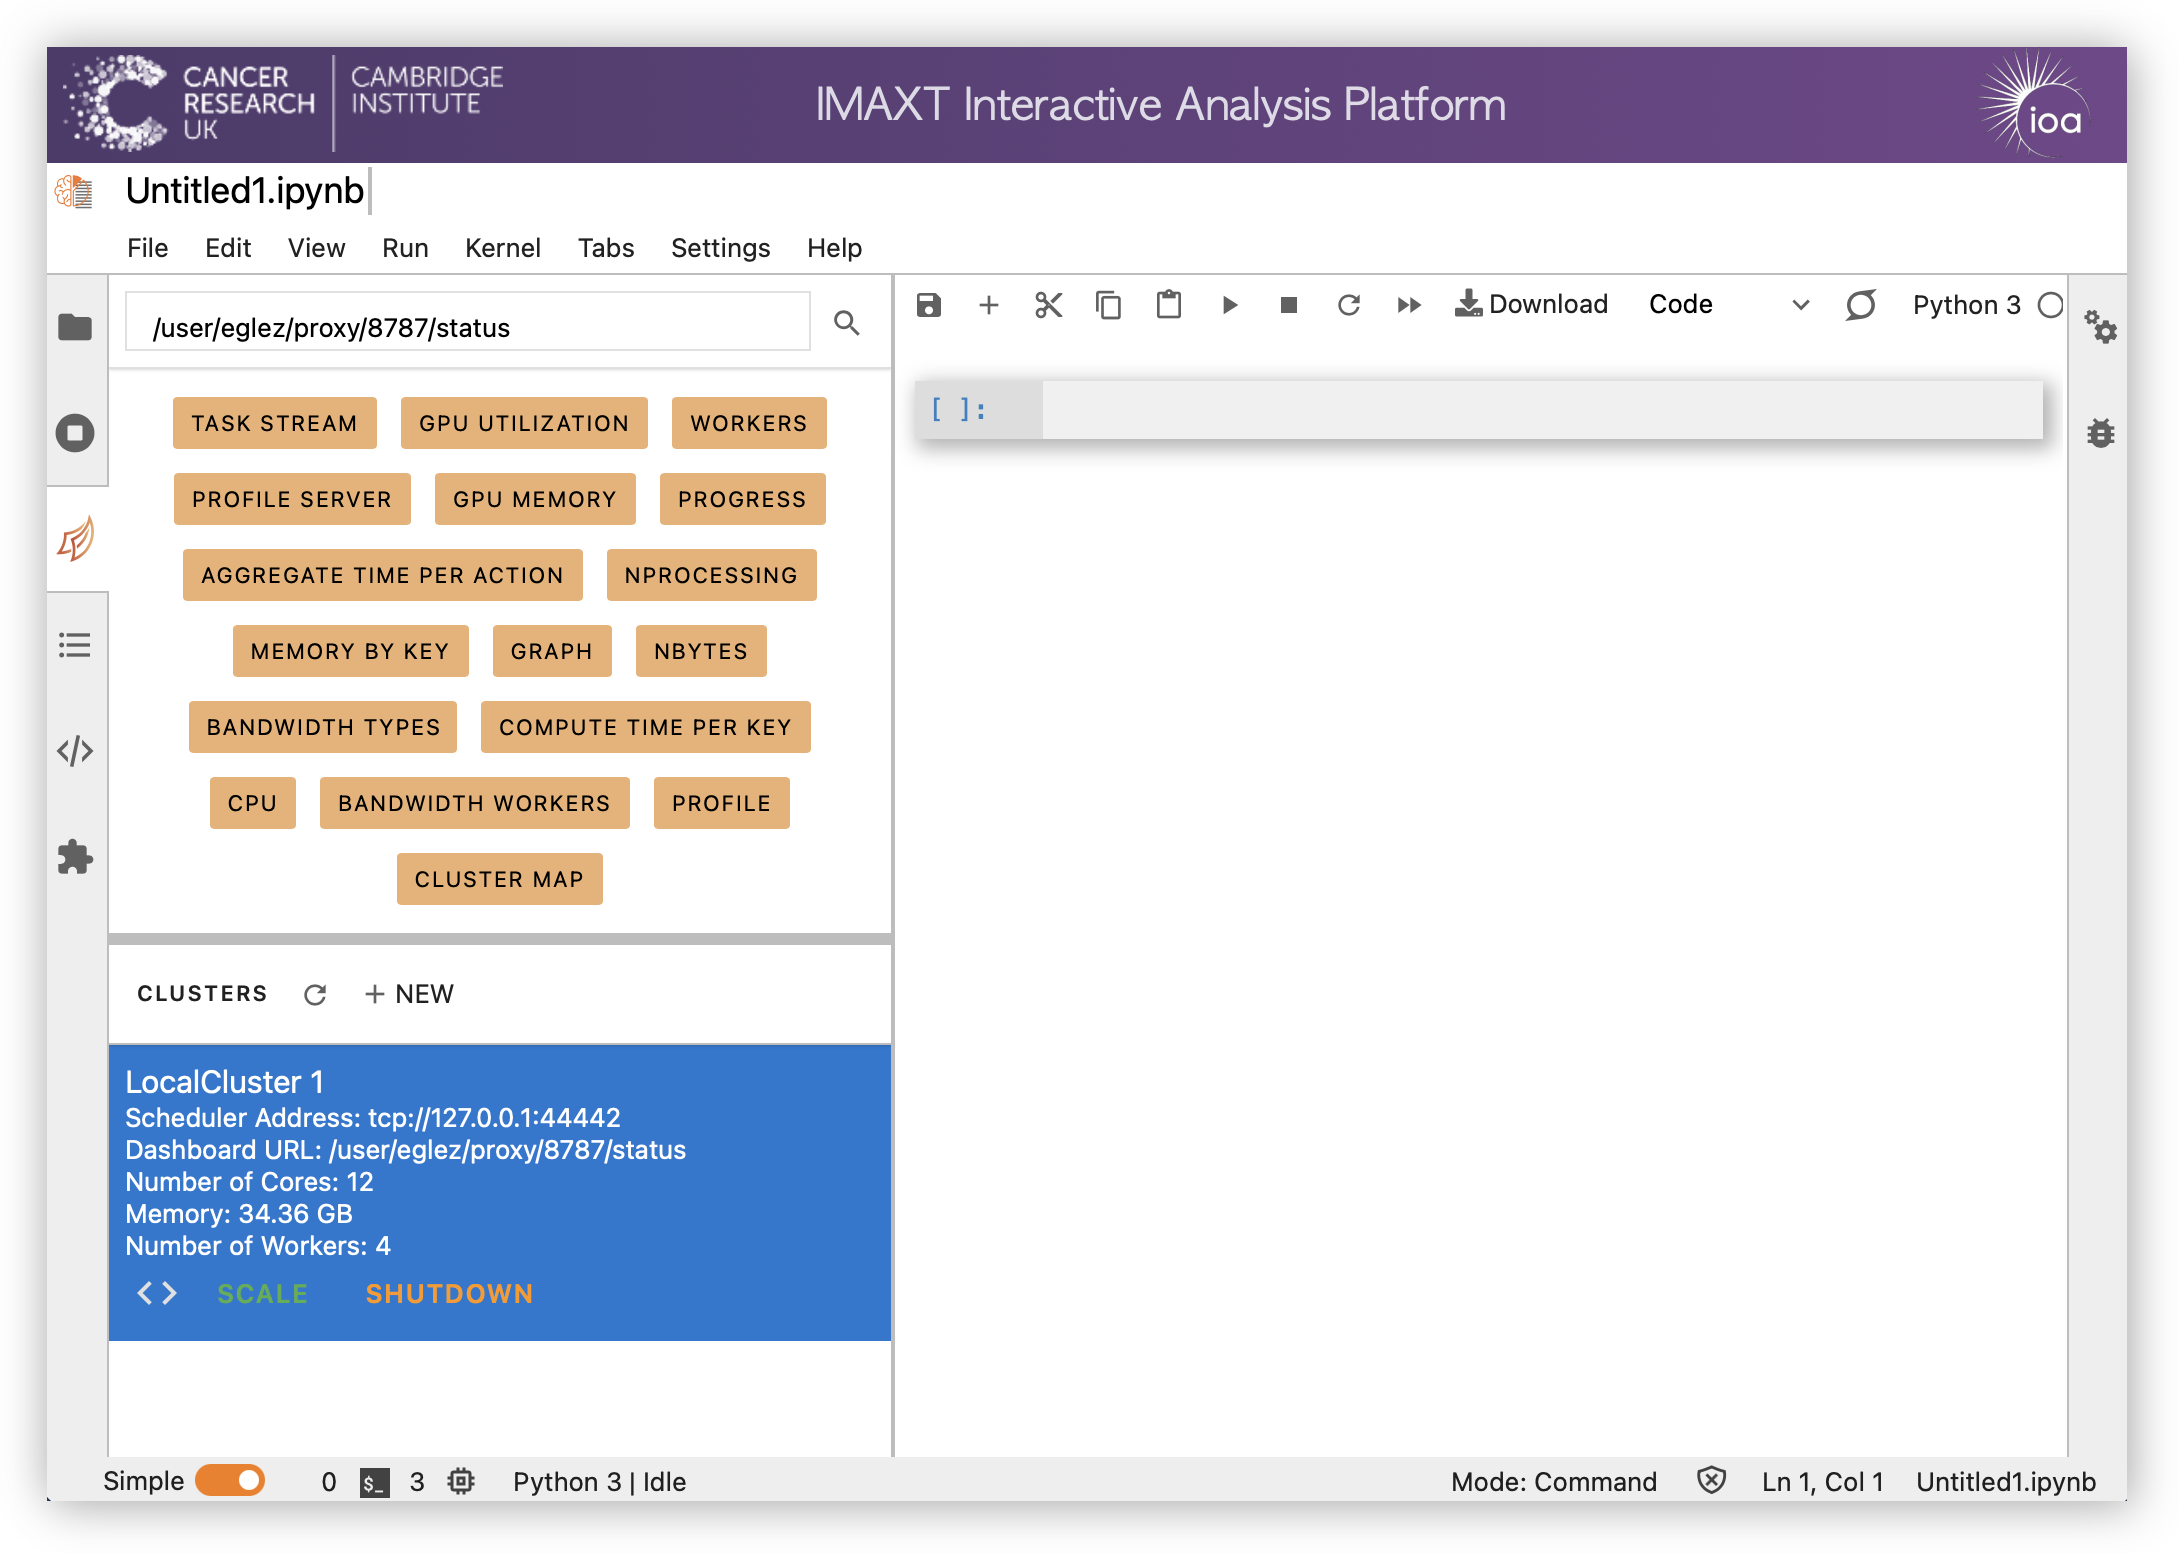
This will create a scheduler with the default number of workers and processes depeneding on the available resources of your notebook server. In order to change the number of worker processes (optional) click on SCALE.
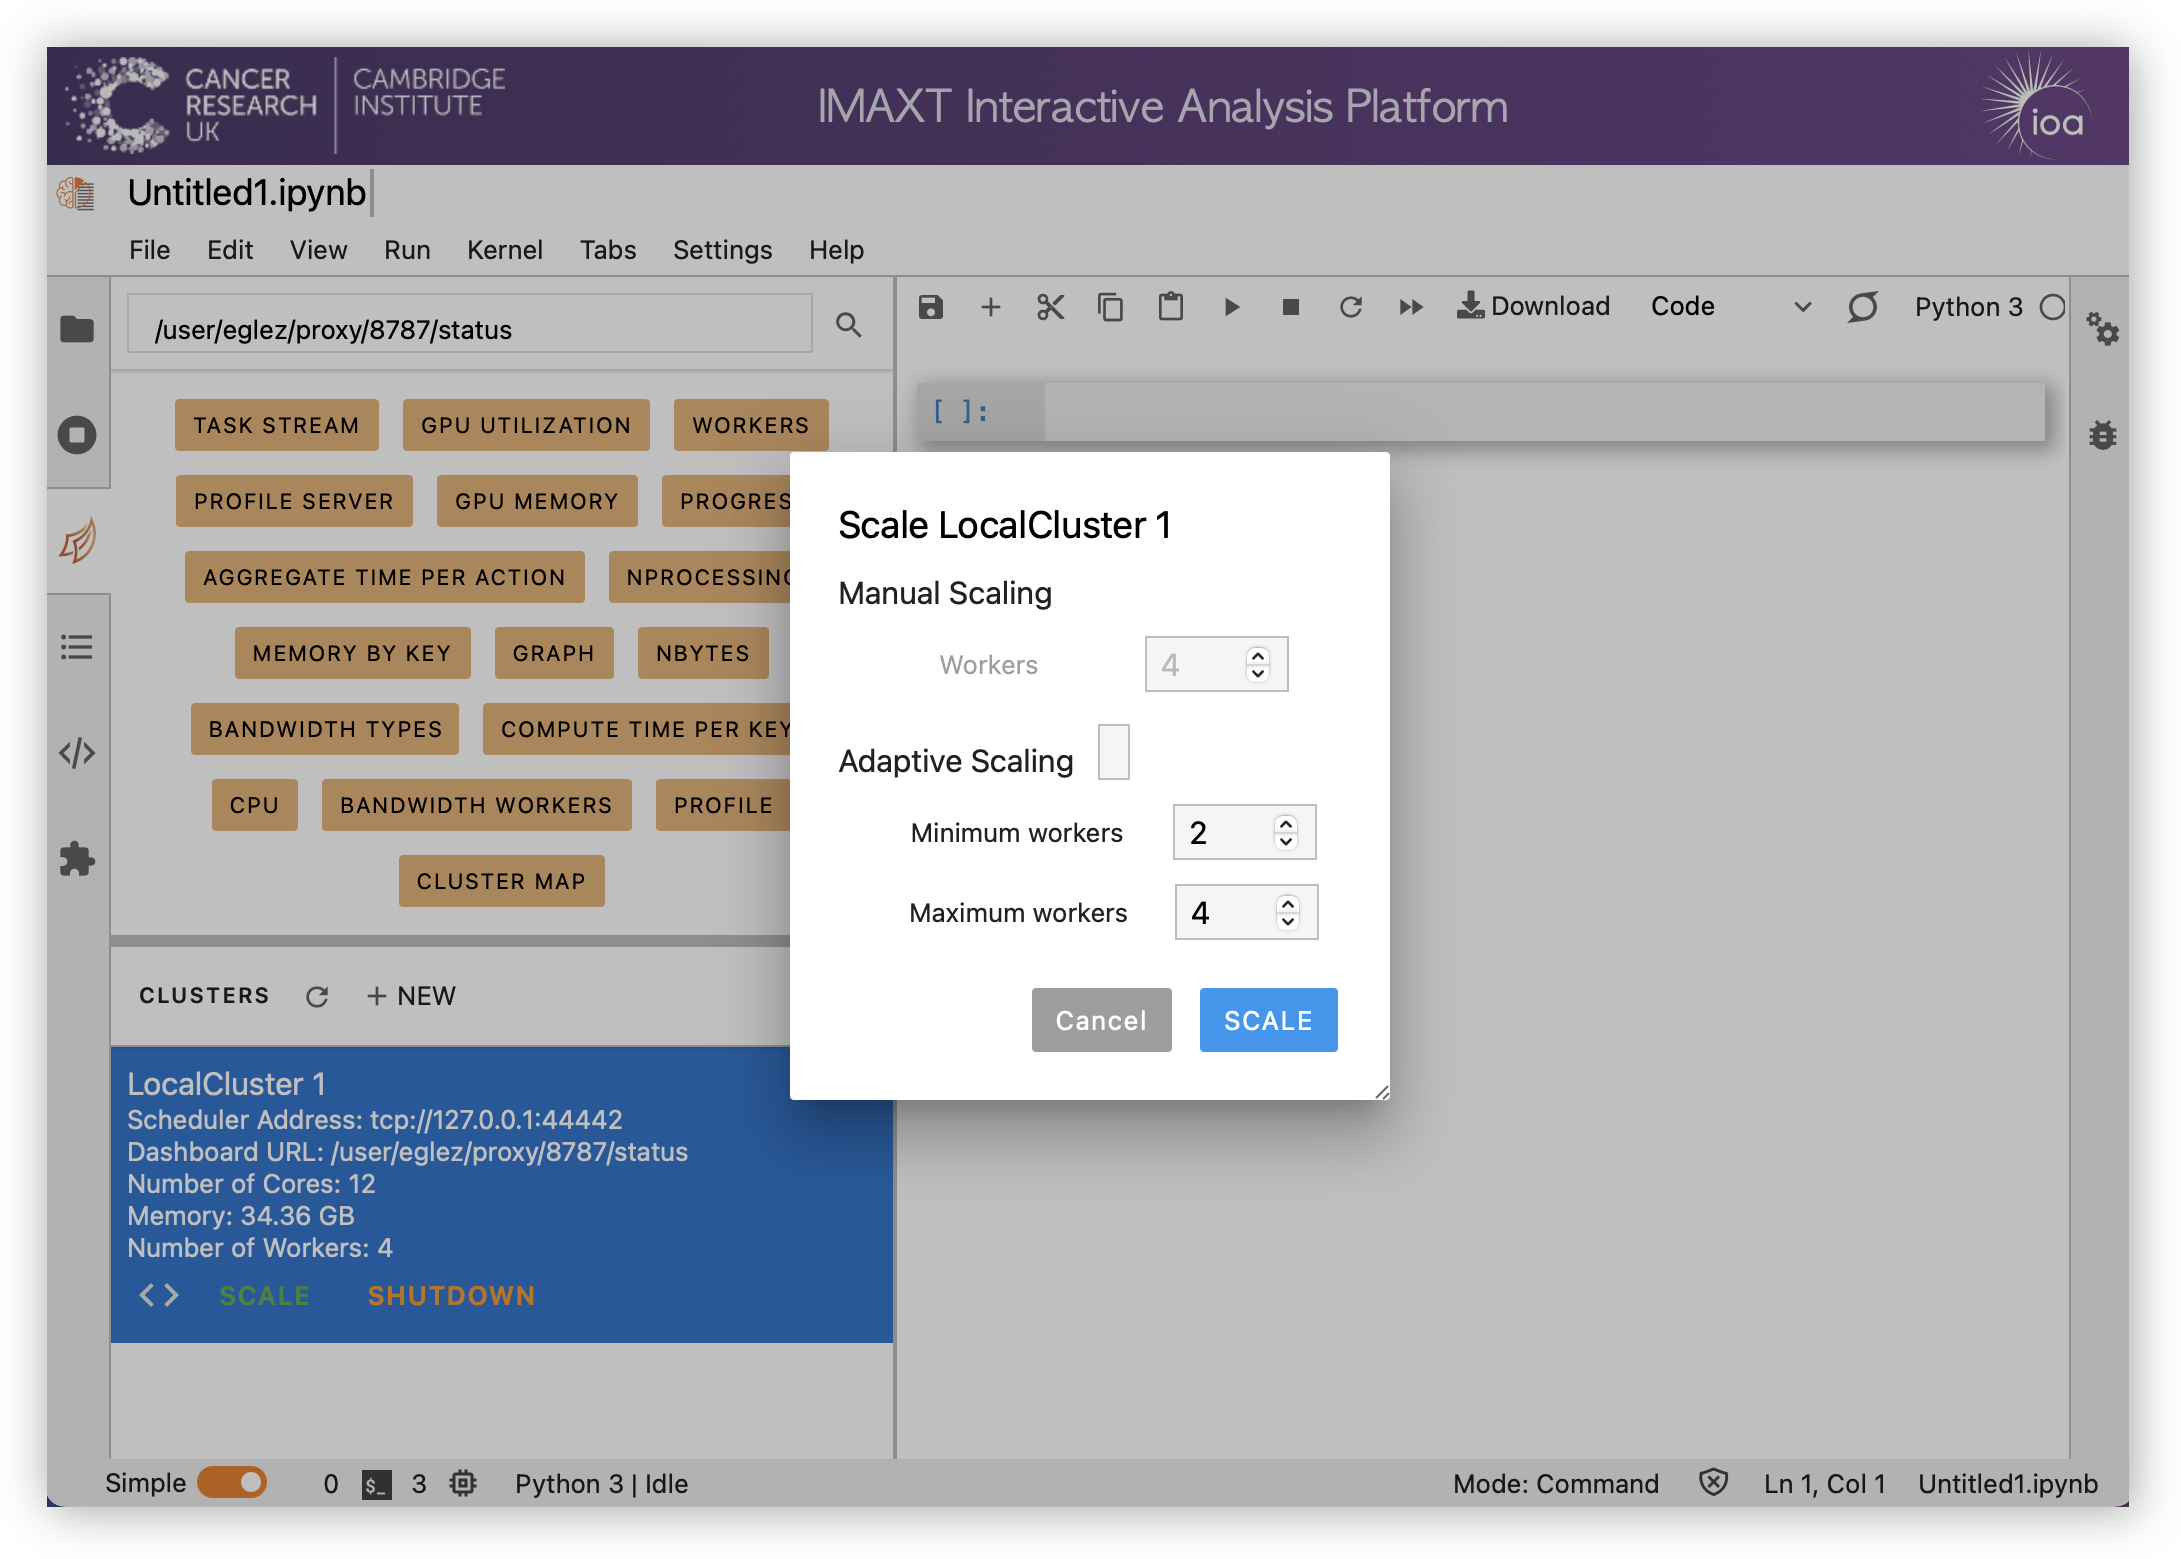
Select the number of workers required under manual scaling. Alternatively check adaptive scaling and select the minimum and maximum number of workers. In this latter case the number of workers will be scaled dependently on the work load.
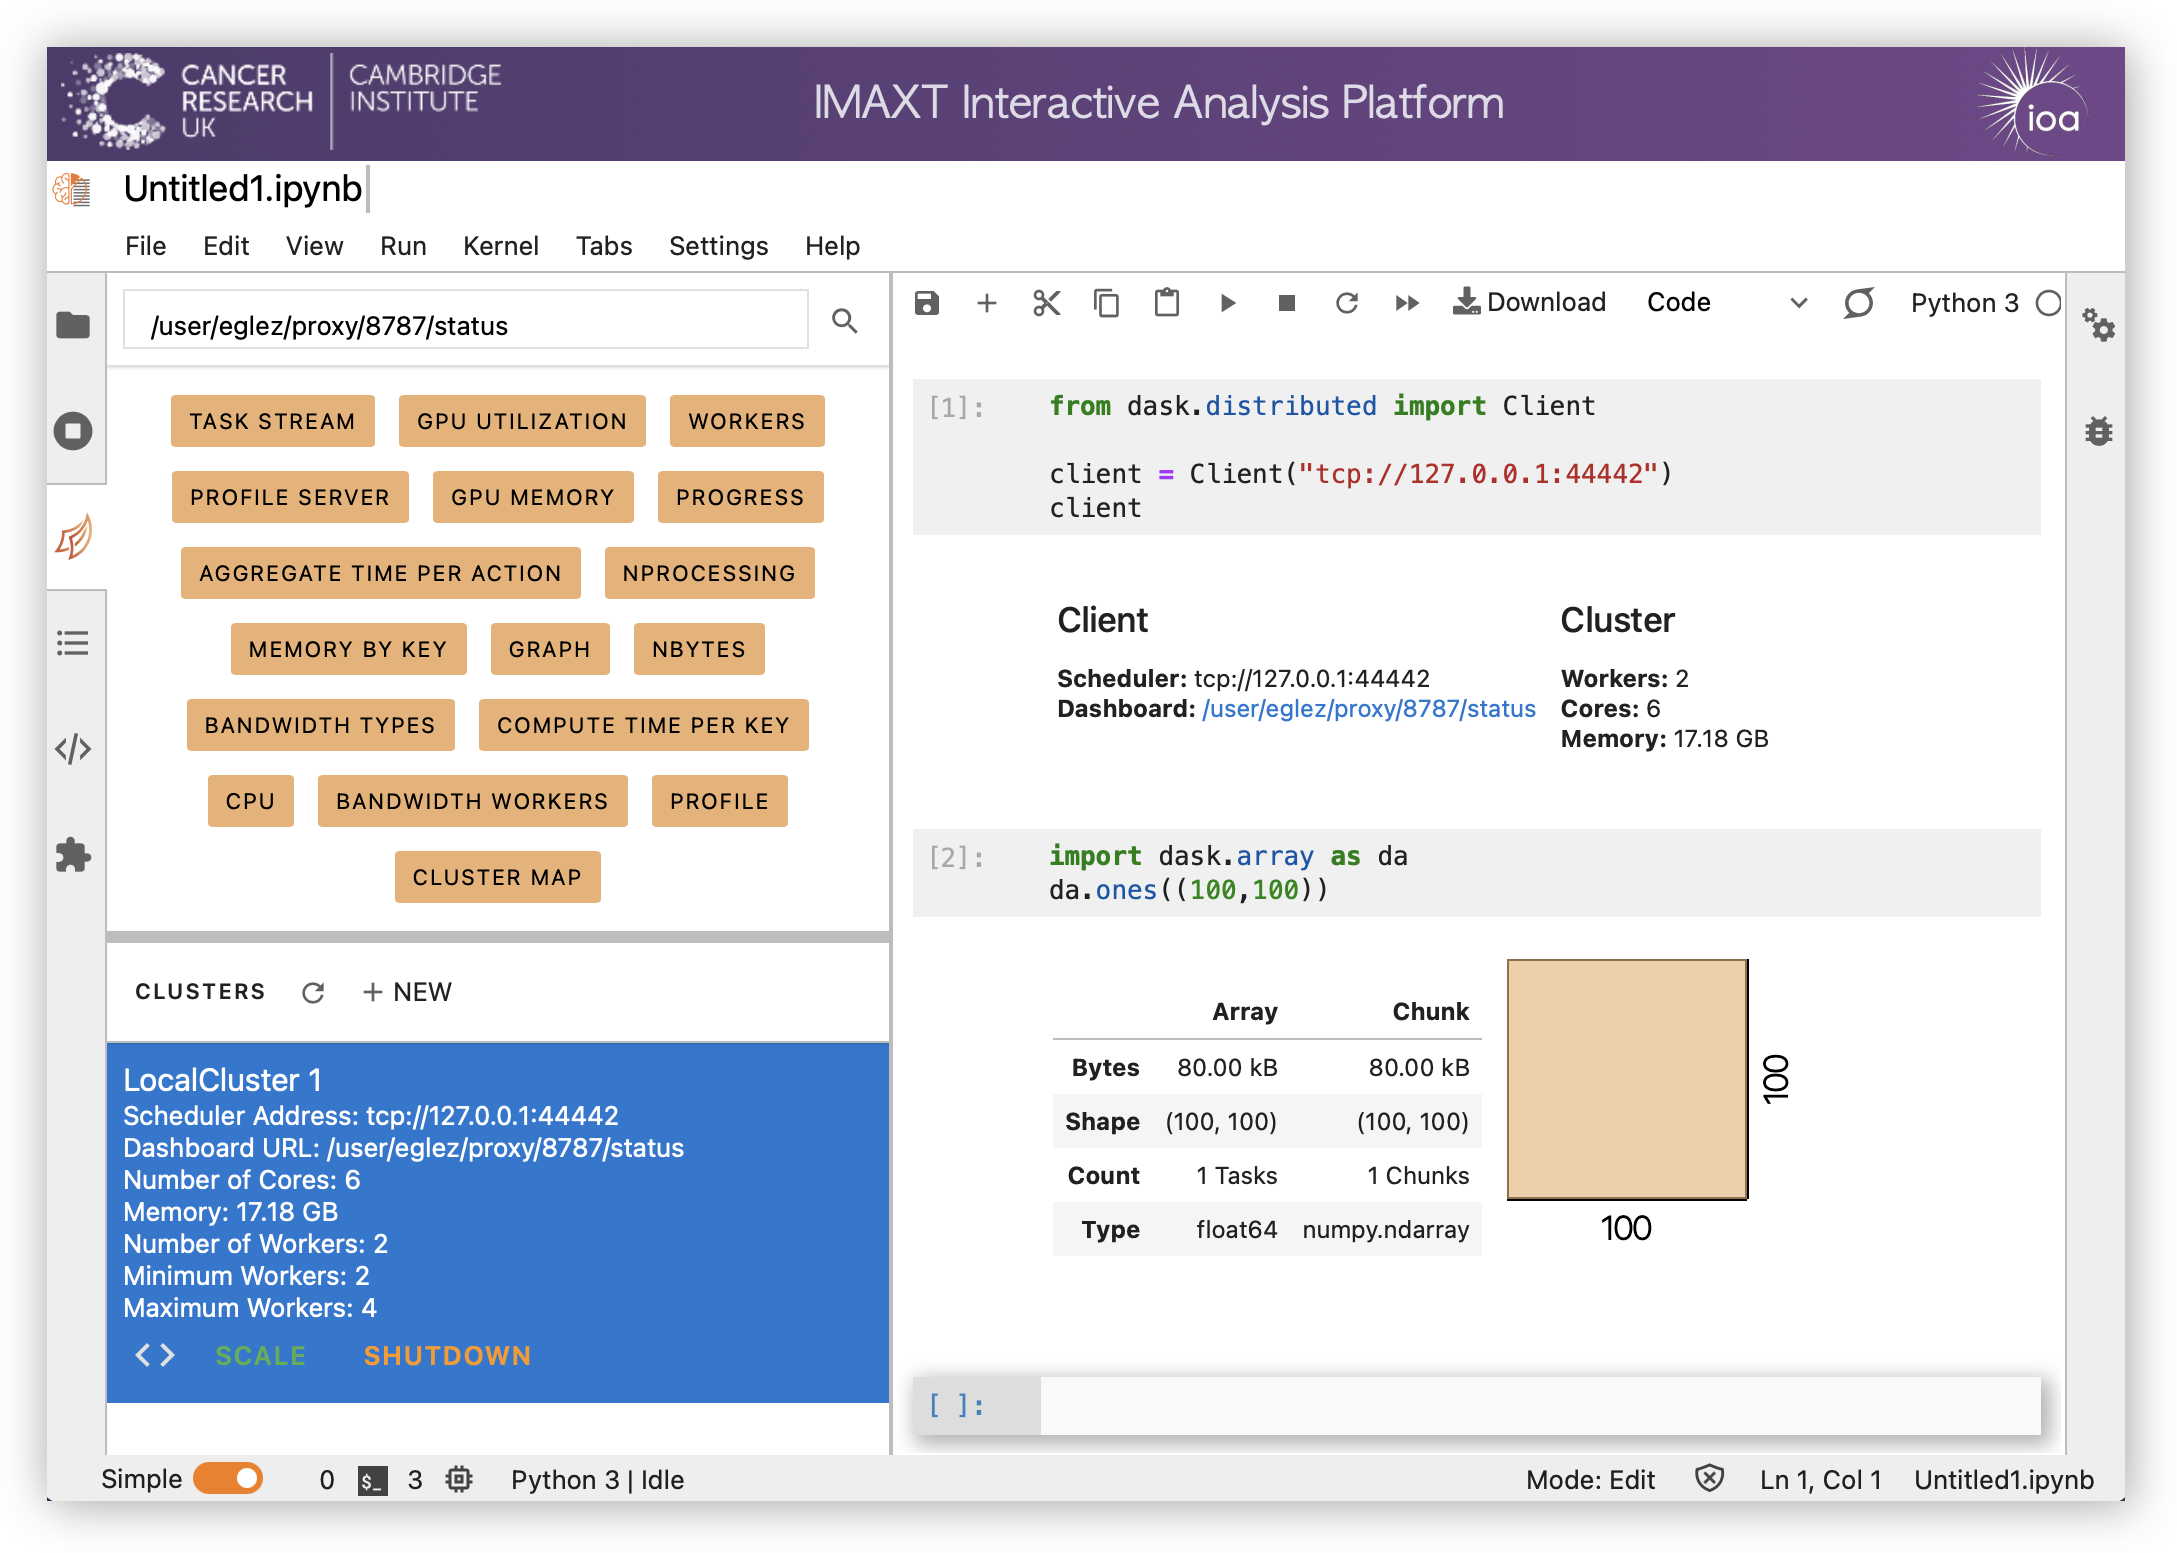
You can then click on <> in order to insert the code needed to connect to the cluster in the current notebook.
The orange buttons in the Dask tab allow to add panels with different visualizations (double click on the buttons to show them) containing processes running, tasks, workers, etc.
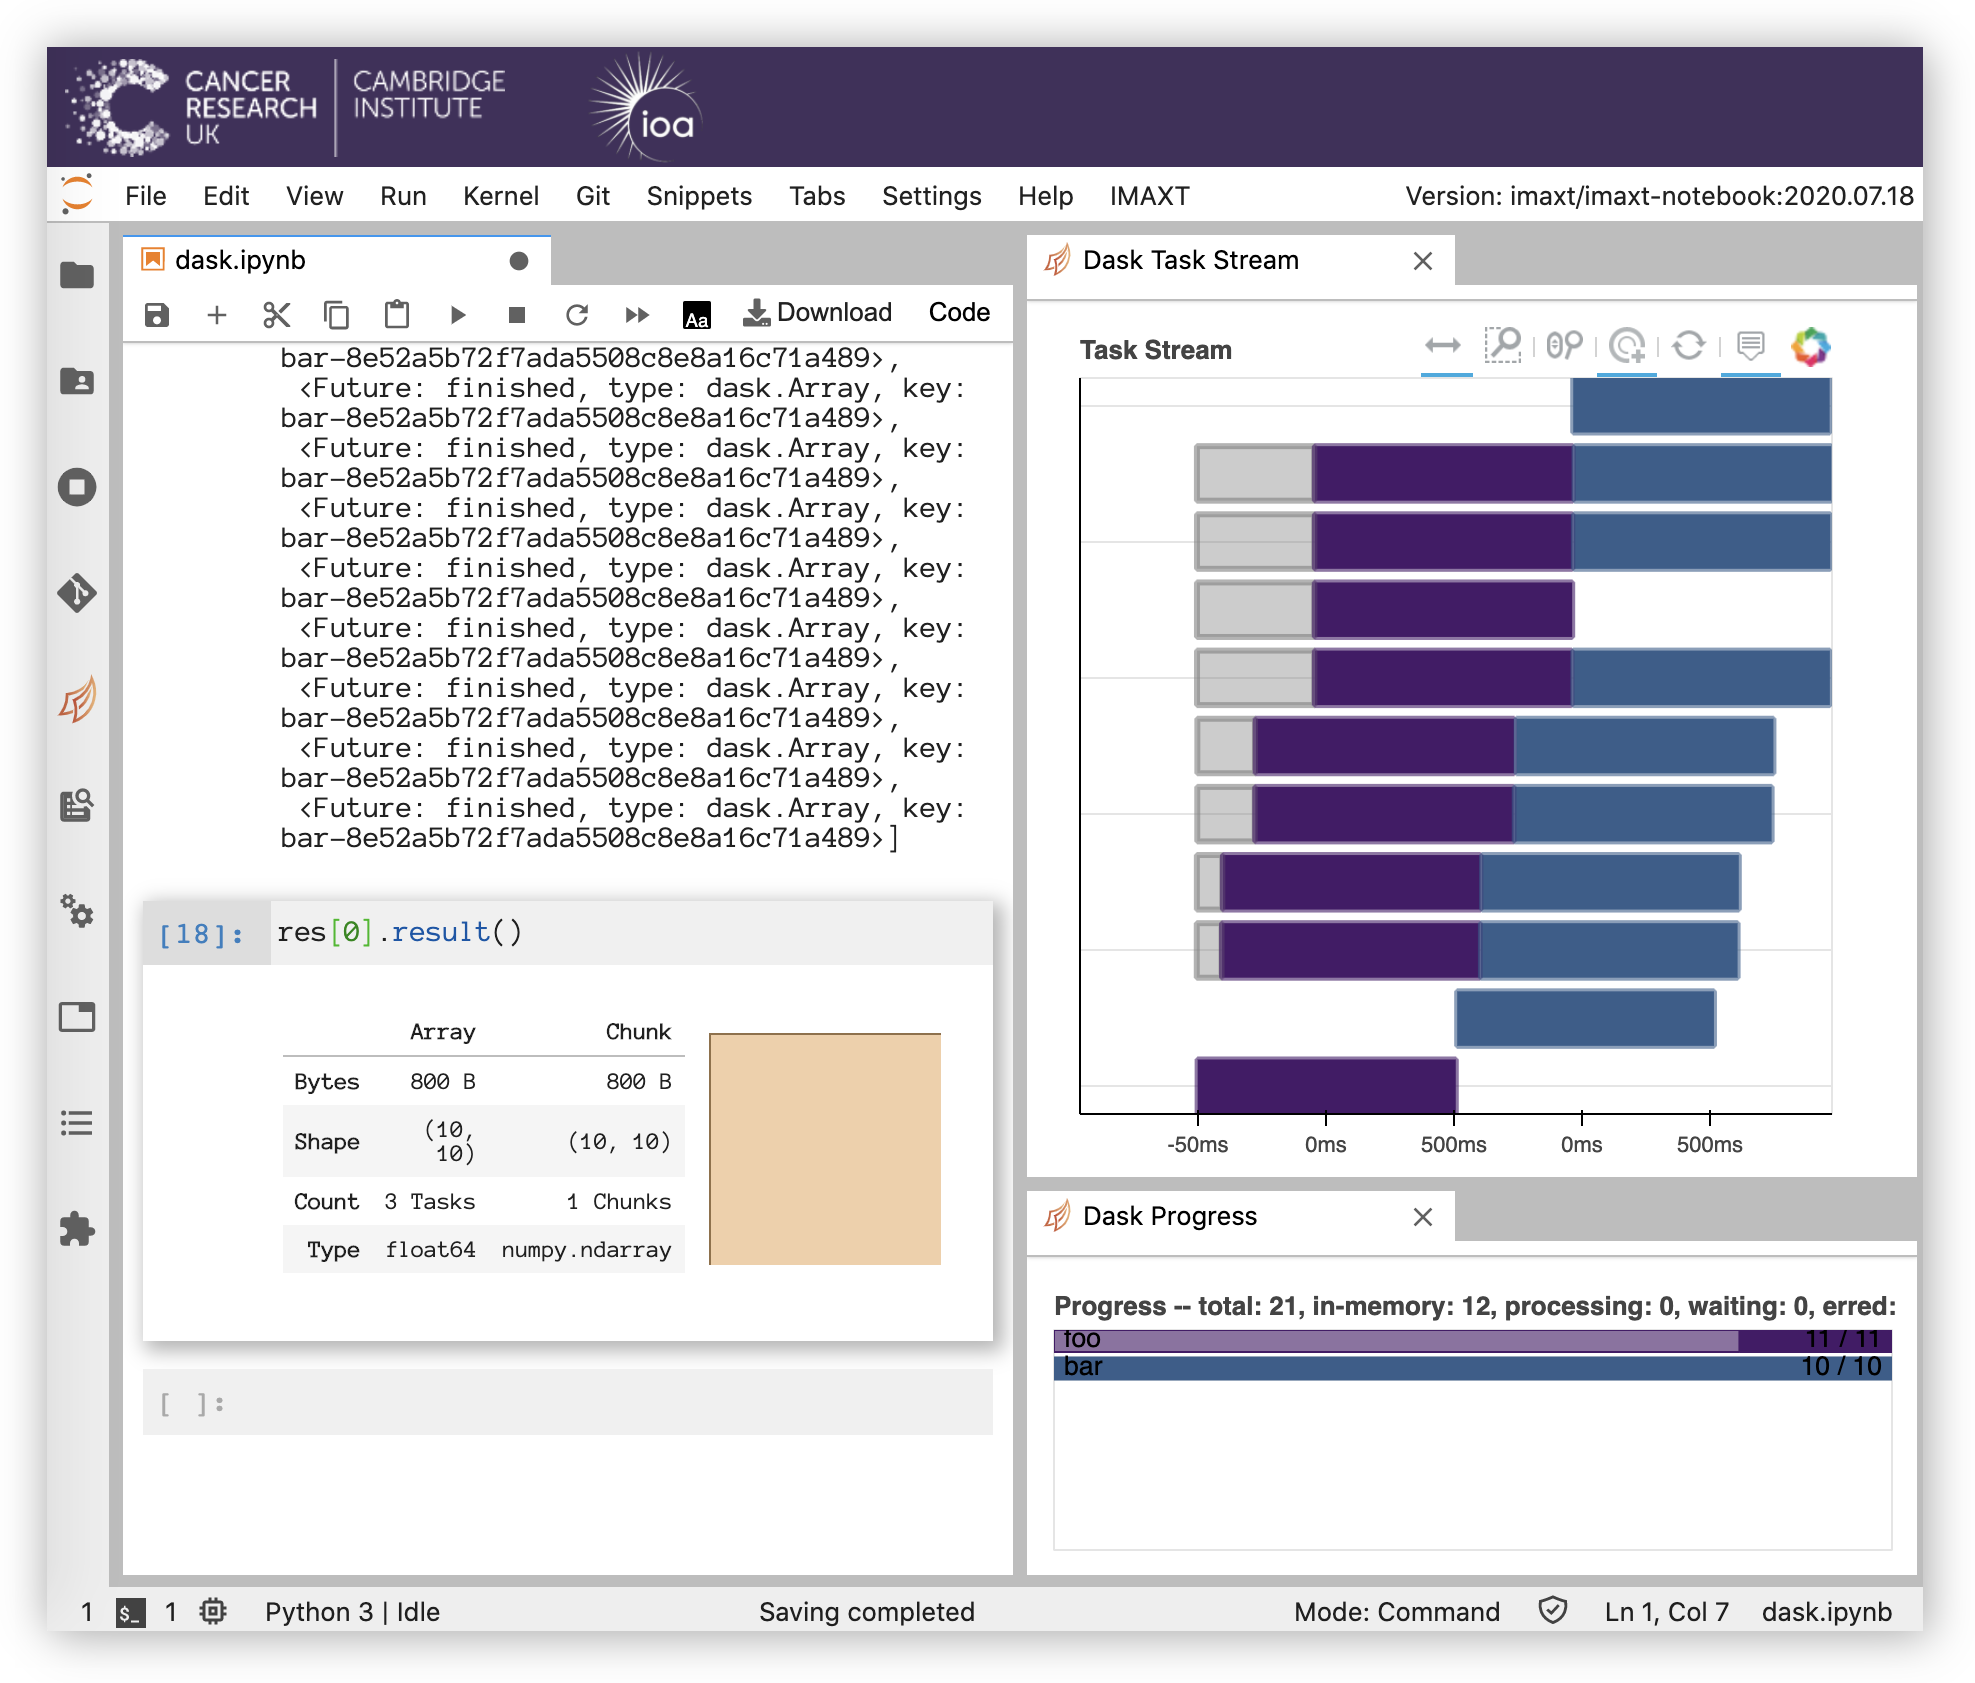
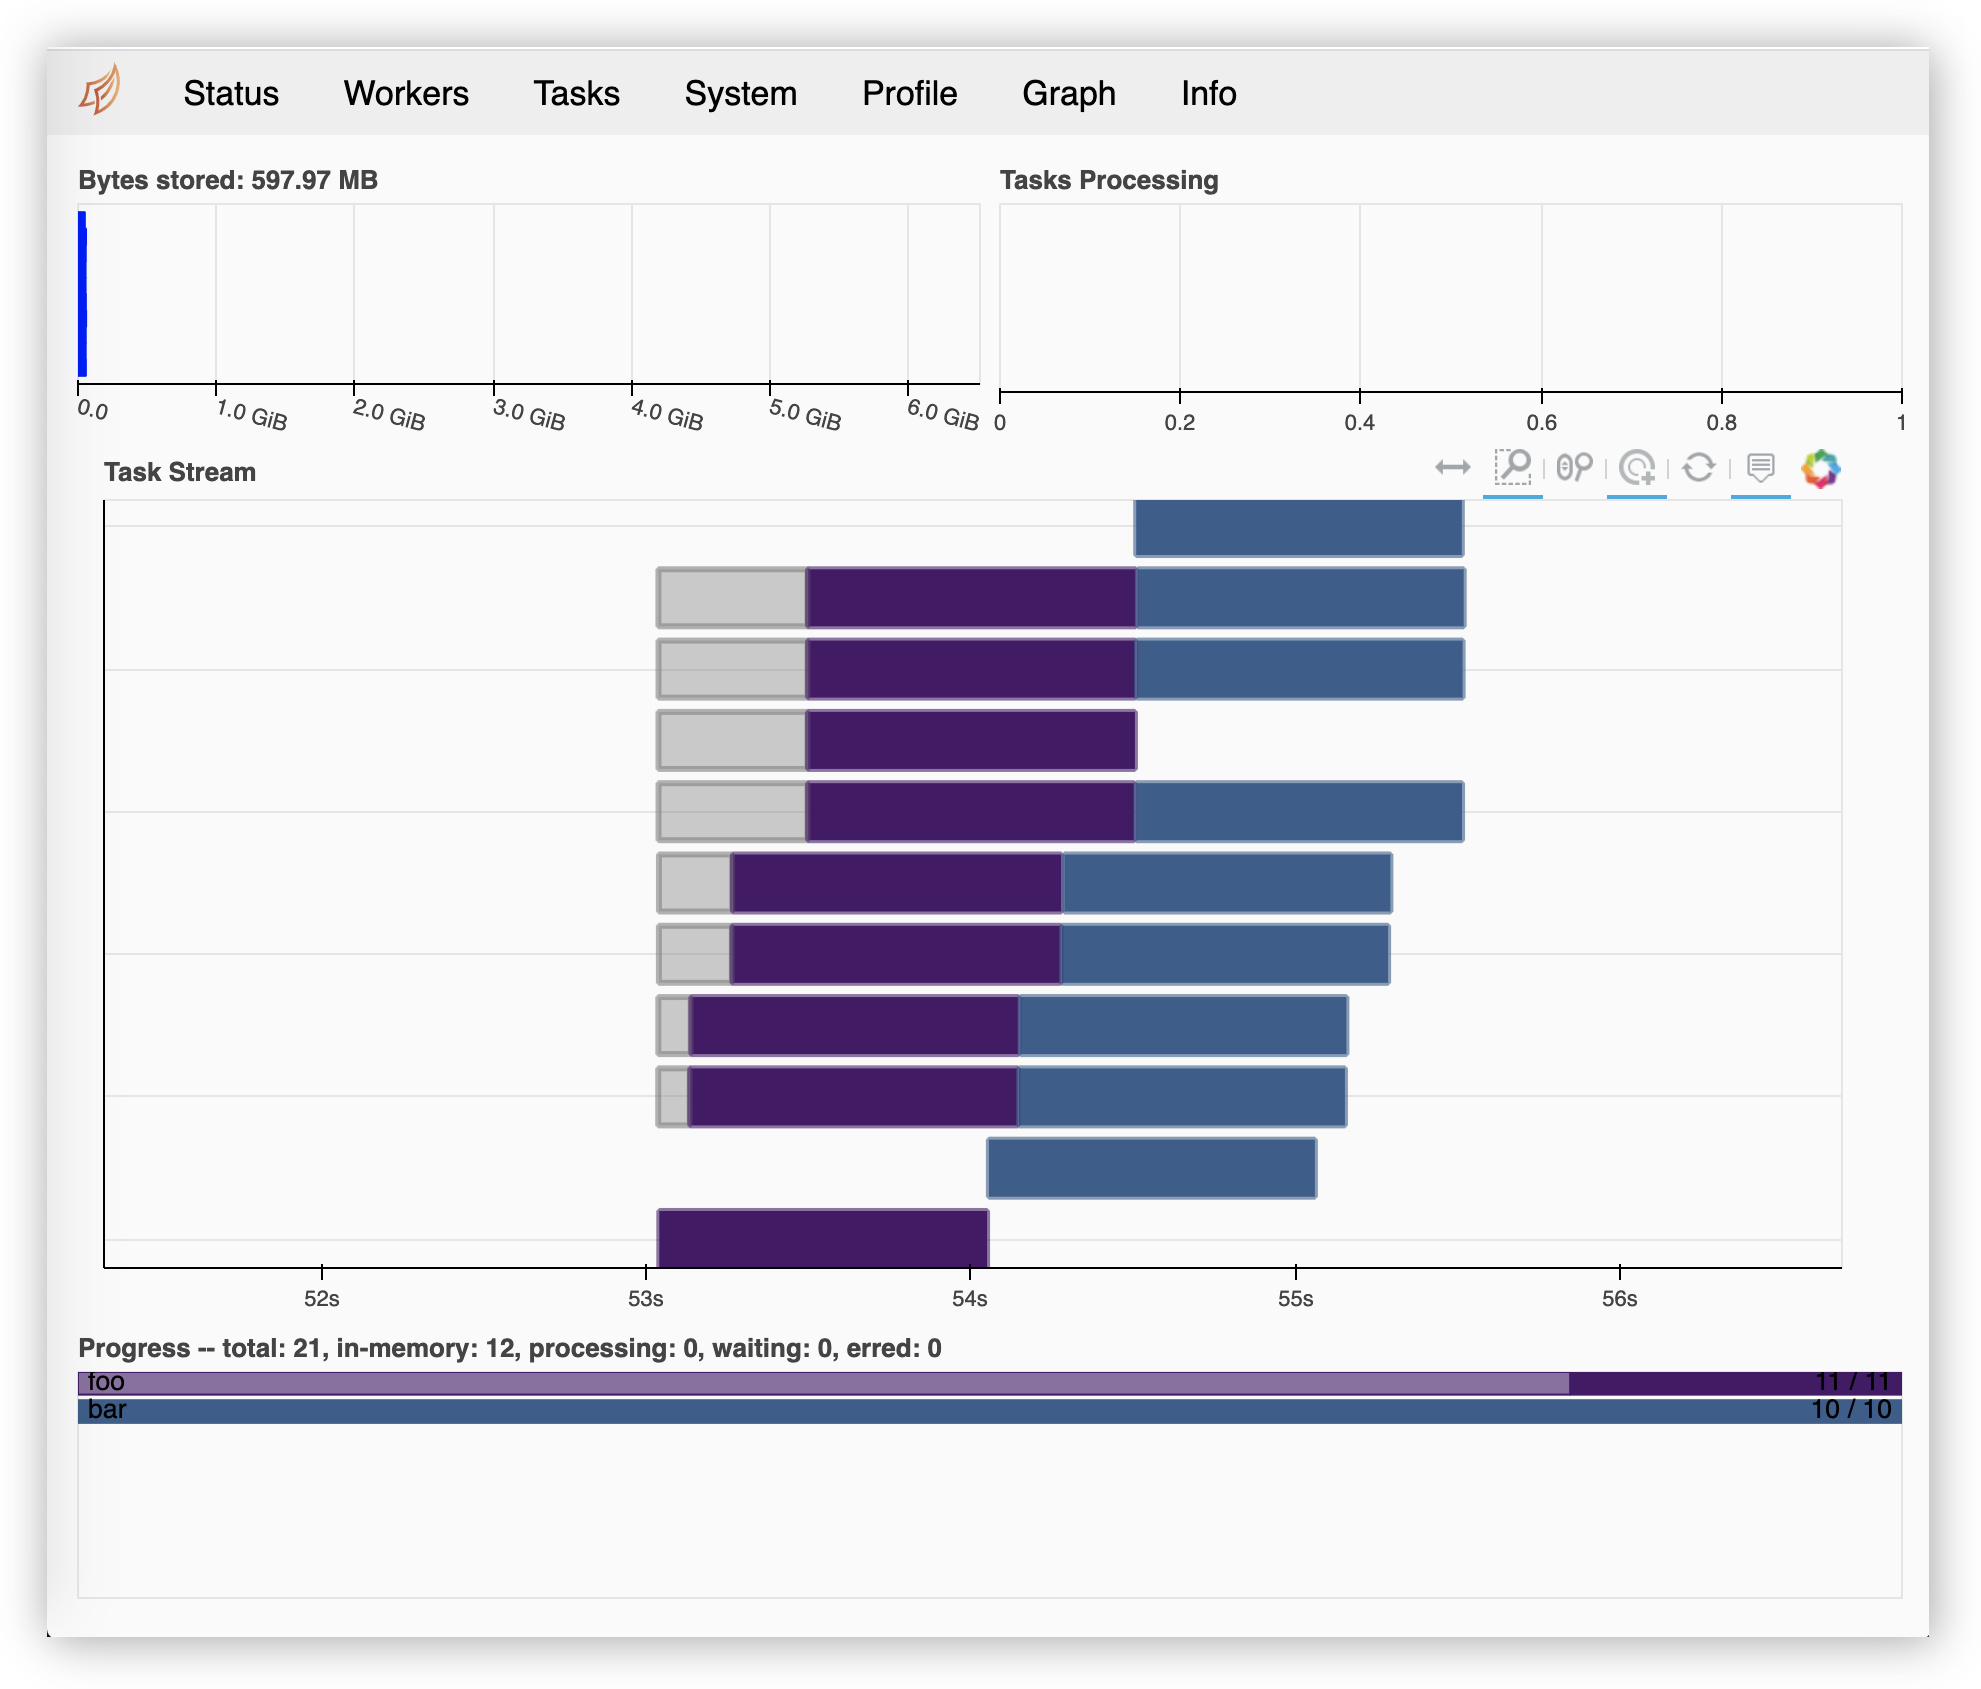
The full status can be obtained by clicking on the Dashboard link that appears when the client is initialized at the begining of the notebook.
Examples and Tutorials
Examples of using Dask to improve performance of tasks and using larger than memory datasets can be found in the Dask Examples website and in our tutorials section.
